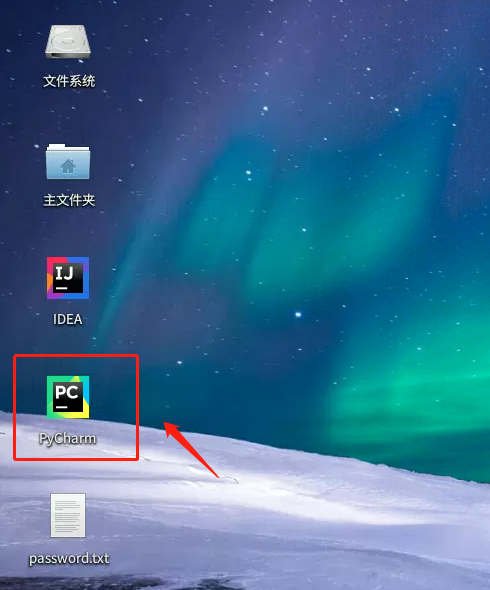
打开PyCharm工具
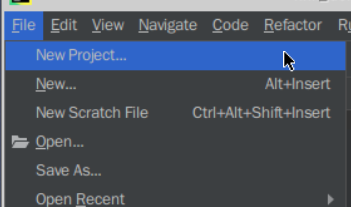
进入后创建项目,点击【+Create New Project】或点击【File------>New Project...】创建项目。

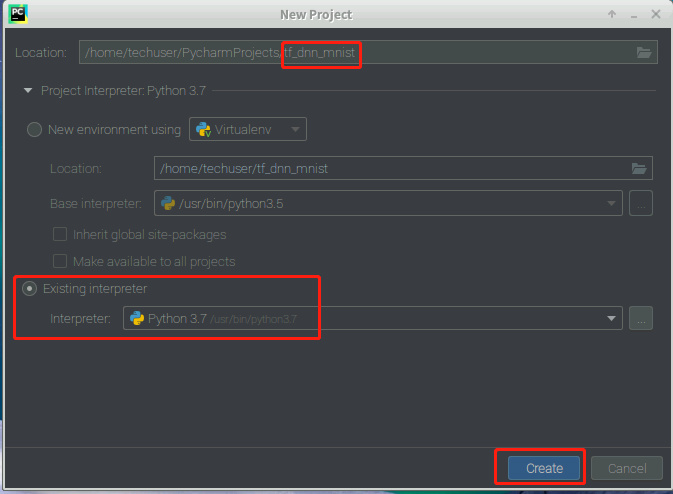
设置项目名称为“tf_dnn_mnist”,选择工作区间(可以保持默认),展开“Project interpreter”,点击下方的“Existing Interpreter”,点击【Create】完成创建。
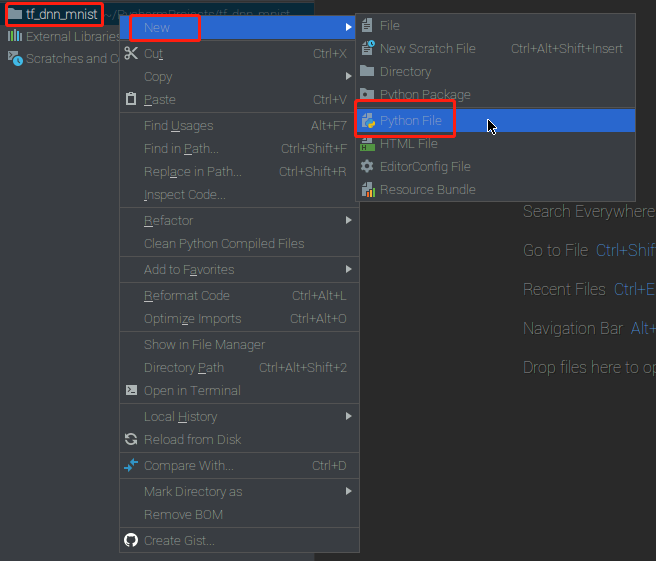
项目创建成功后,初始界面如下所示,右键点击tf_dnn_mnist项目名称,选择New—>Python File,创建一个新的python文件。
新建的python文件为tf_dnn_mnist.py文件,用于算法的测试实验实现。如下图所示:

双击python文件名,在编辑器里面编写tf_dnn_mnist.py文件,写入相关代码,具体程序如下。
直接从tensorflow直接读取数据集,输入如下代码:
拷贝代码import os
import tensorflow as tf
from tensorflow import keras
from tensorflow.keras import layers, optimizers, datasets
(x_train_raw, y_train_raw), (x_test_raw, y_test_raw) = datasets.mnist.load_data()
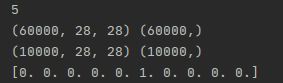
print(y_train_raw[0])
print(x_train_raw.shape, y_train_raw.shape)
print(x_test_raw.shape, y_test_raw.shape)
#将分类标签变为onehot编码
num_classes = 10
y_train = keras.utils.to_categorical(y_train_raw, num_classes)
y_test = keras.utils.to_categorical(y_test_raw, num_classes)
print(y_train[0])
当采用DNN网络进行识别时,构建的是全连接网络所以输出应该是向量的形式,而非现在图像的矩阵形式。因此我们需要把图像整理成向量。
拷贝代码#将28*28的图像展开成784*1的向量
x_train = x_train_raw.reshape(60000, 784)
x_test = x_test_raw.reshape(10000, 784)
#将图像像素值归一化
x_train = x_train.astype('float32')/255
x_test = x_test.astype('float32')/255
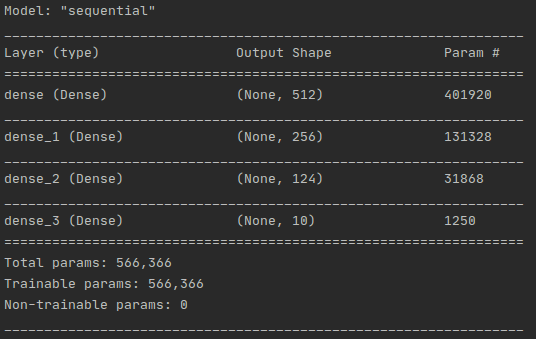
拷贝代码# 创建模型。模型包括3个全连接层和两个RELU激活函数
model = keras.Sequential([
    layers.Dense(512, activation='relu', input_dim = 784),
    layers.Dense(256, activation='relu'),
    layers.Dense(124, activation='relu'),
layers.Dense(num_classes, activation='softmax')])

print(model.summary())
定义优化器、损失函数、评价指标:
拷贝代码Optimizer = optimizers.Adam(0.001)
model.compile(loss=keras.losses.categorical_crossentropy,
              optimizer=Optimizer,
              metrics=['accuracy'])
拷贝代码# 使用 fit 方法使模型对训练数据拟合
model.fit(x_train, y_train,
          batch_size=128,
          epochs=10,
          verbose=1)
拷贝代码score = model.evaluate(x_test, y_test, verbose=0)
print('Test loss:', score[0])
print('Test accuracy:', score[1])

model.save('final_dnn.h5')
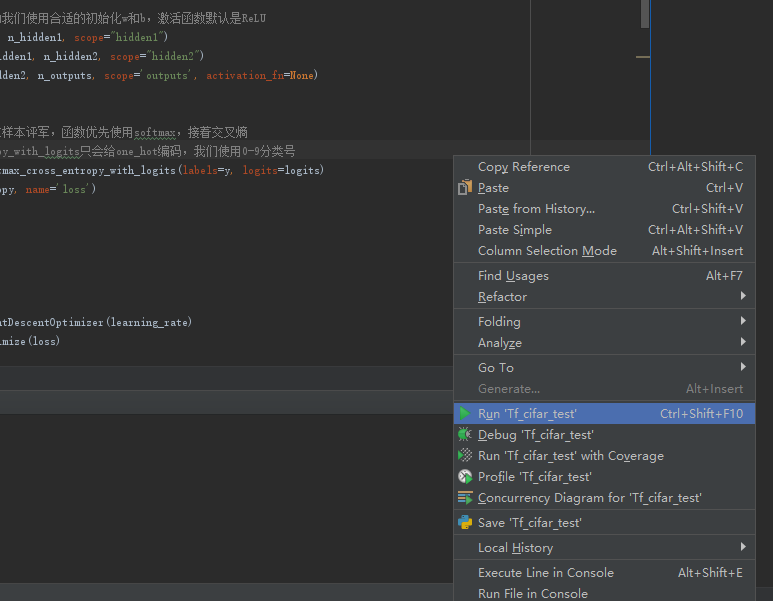
在tf_dnn_mnist.py文件空白处,右键点击,点击Run‘tf_dnn_mnist’,运行文件。
得到输出结果:
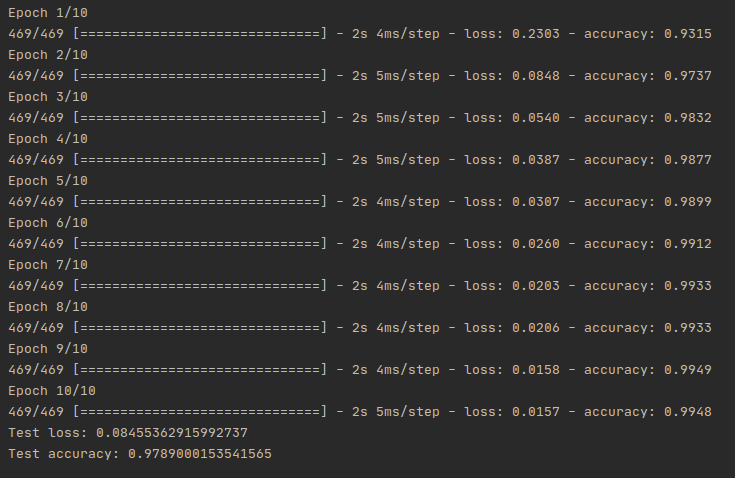
结果分析: